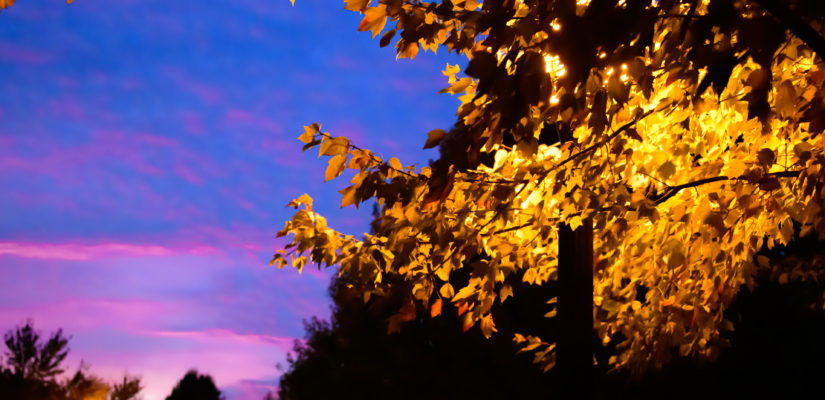
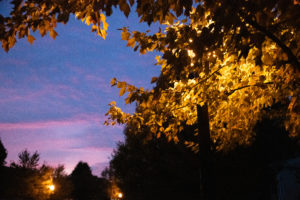
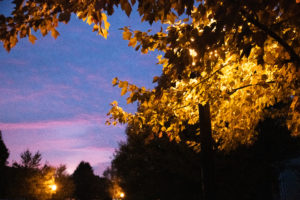
Morning Sky and the Street Light – Have you adjusted colour in this?
Have you adjusted colour in this?
I posted a photograph on Facebook.com and my Aunt Catherine commented with the above. (First thing is that you should note that color is spelt with the proper British spelling, she is being Canadian.) I was going to respond with quick answer, and the more I wrote, erased, wrote, I realized that I needed to post this on my blog.
I struggled for a few years on post production editing and if I was still a photographer with a photograph or has it moved to photo-art? With today’s digital photography we have wonderful tools to enhance photographs. We boost colors, and crop, straighten, add filter effects, and so on. Does this change the photograph to ART?
I am not a ‘photojournalist’ which I believe should keep the image as close to the sensor as you can, but a photographer, who, before there was digital there was a darkroom. The value of a photograph is in the printing of it, not the negative. When you watch auctions for older works it is not the negative that the photographer took that is of value, but how the photographer developed the negative, in his or her darkroom that determined the value of the photograph.
So, what is a photograph?
The dictionary definition, “a picture or likeness obtained by photography” where Photography is “the art or process of producing images by the action of radiant energy and especially light on a sensitive surface (such as film or an optical sensor)”
Wikipedia defines it as “A photograph (also known as a photo) is an image created by light falling on a photosensitive surface, usually photographic film or an electronic image sensor, such as a CCD or a CMOS chip. Most photographs are created using a camera, which uses a lens to focus the scene’s visible wavelengths of light into a reproduction of what the human eye would see. The process and practice of creating such images is called photography. The word photograph was coined in 1839 by Sir John Herschel and is based on the Greek φῶς (phos), meaning “light”, and γραφή (graphê), meaning “drawing, writing”, together meaning “drawing with light”.[1]”
For me, I would define it as “the process of capturing light to reproduce an image that creates an emotional response to an instance of time.” My goal when I lift my camera is to have others, later, have an reaction to the event I am seeing. This could be one of my children at a location, or more often for me, a scene that I am seeing in front of me.
Key is though, like ART, the photograph needs to stir a response, while representing what I saw through the lens.
The challenge.
The challenge is that the human eye is such an incredible thing that we cannot reproduce what we see in an image. There is a bunch of technical explanations on this, especially when you research HDR (High Dynamic Range) photography
The non-technical is like this, you look at an scene or event, let us imagine a birthday celebration, we turn down the light, and bring in the birthday cake with all of the candles lit. The faces are glowing of the celebrants, and the birthday girl’s is extra lit as she prepares to blow out the candle.
Your eye quickly moves from face to face, absorbing the joy in people’s emotion, and then to the cake where the pink candles are dripping wax down to the pure white icing, and then finally to the face of the birthday girl’s amber lit face as she puffs her cheeks to blow the candle.
To capture this moment, as I know many of you have tried, you may have shot a FLASH and taken a photo, or, not. The first lit the room so much you lost the candle glow on the faces, but you see the cake and that pure white icing, the second, you capture the amber faces, but the cake has an off color with the dark shadows produced from low light.
As a photographer, you need to decide what part of the moment, you want to preserve in a photograph to stir the emotion? Was that cake the best ever made, and you need it to be the center, or was the emotion of the birthday girl.
Your eye captured it all, but the camera cannot… or cannot in a single shot.
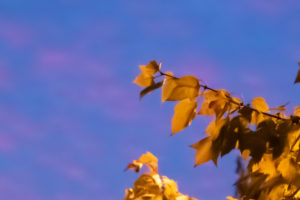
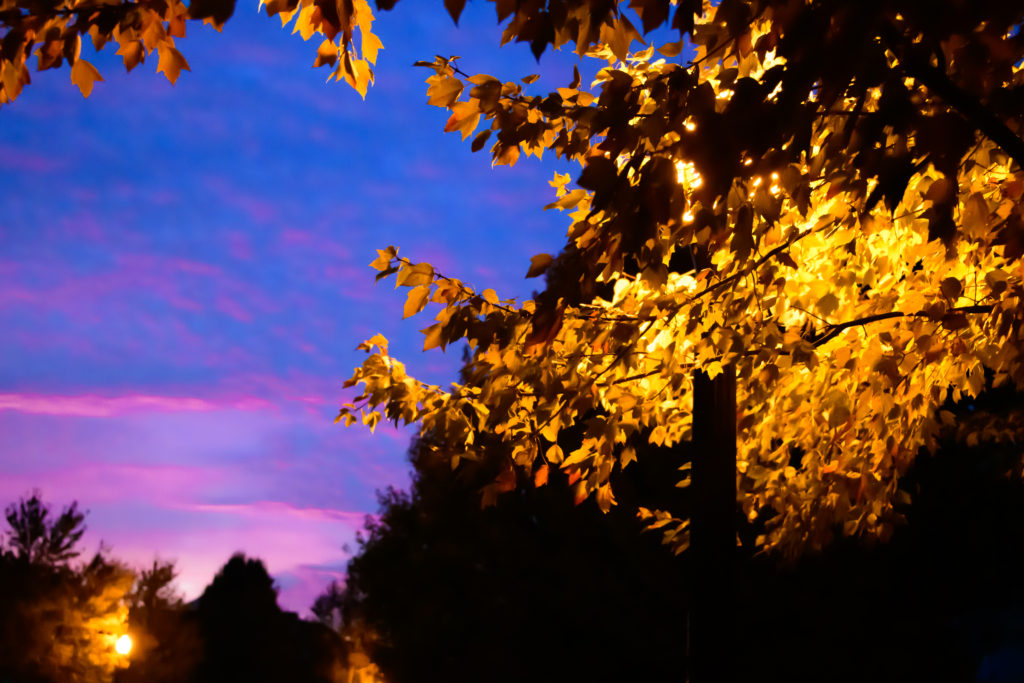
An different shot from that morning.
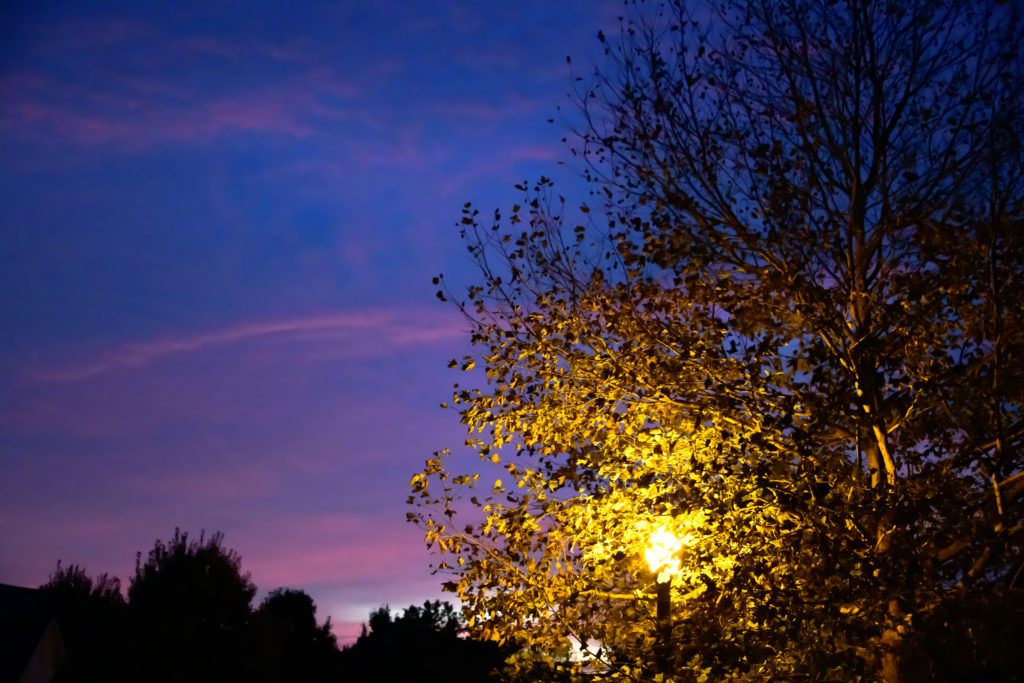
What I thought I would do is show another set of photographs that I took. This / these were taken a few feet further away, and at different exposure settings. I set the Nikon D850 to do Bracketing Exposure of 5 shots, 1 stop apart.
This produces 5 photographs, 1 at what the camera thinks is the proper exposure for the scene,

1 slightly underexposed, another, more underexposed,
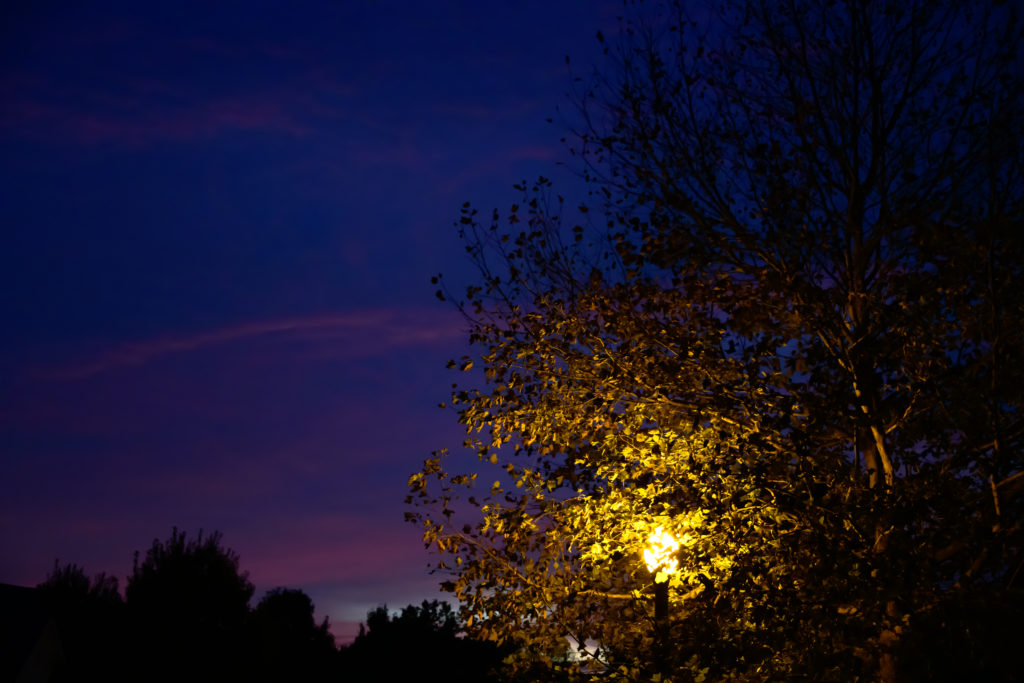
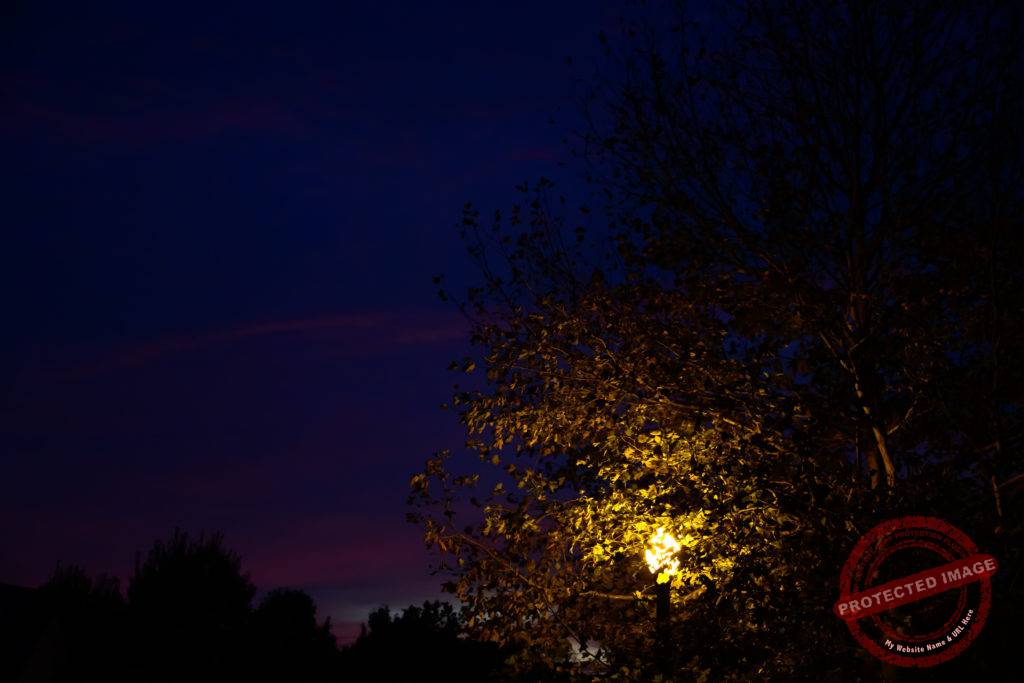
and then the same on overexposed.
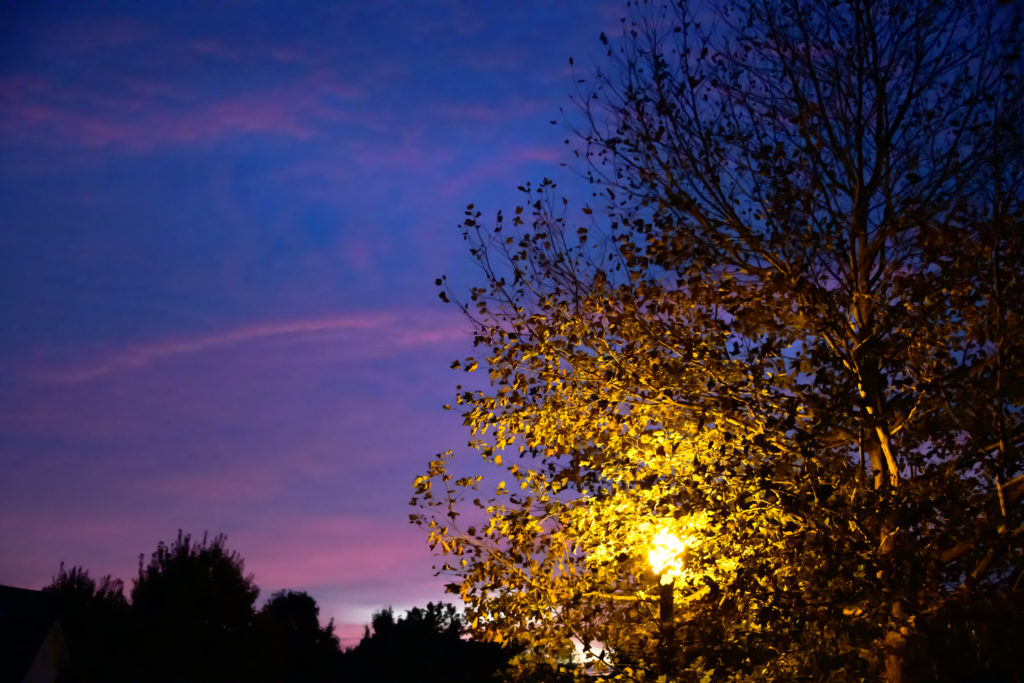
Five photographs all showing different colors due to the exposure settings. Using Adobe Lightroom (the modern equivalent to the Darkroom of the past) I combined these photographs to a single HDR photograph. The software, preserves what my eye saw in the pink lit sky while allowing also what I saw in the amber lit tree from the street light.

Which is VERY close to the first ‘properly’ exposed image according to my Nikon D850 (a credit to the power of this wonderful camera), but not quite the same;
The left being the properly exposed, the right the HDR (combining the five images). You can see that the street light is not over exposed, and the blues are a bit more subtle.
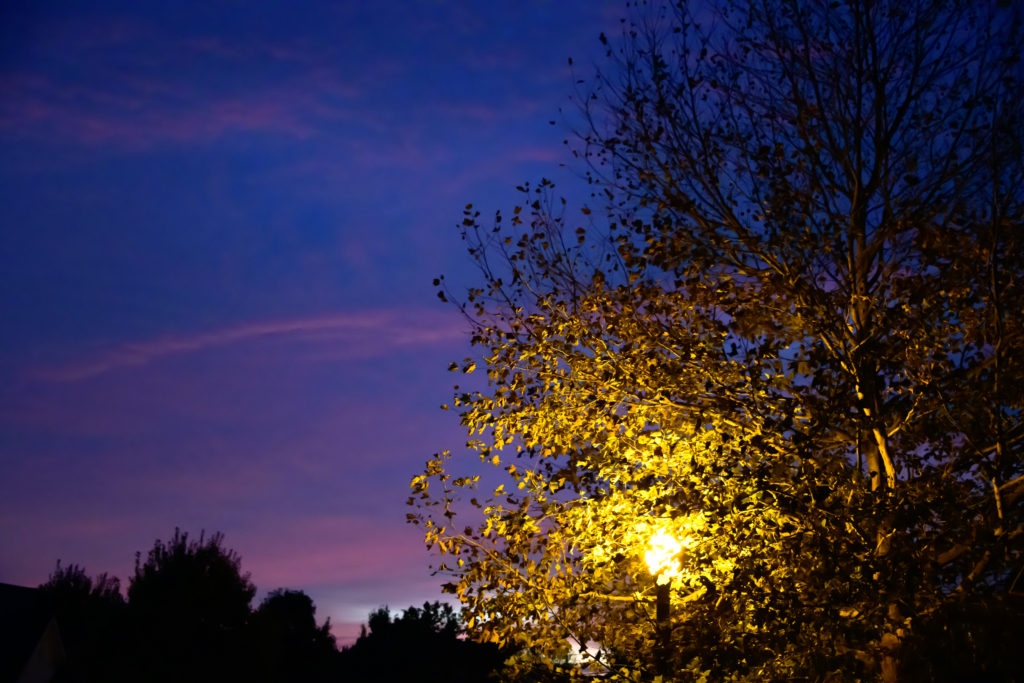
The answer to “Have you adjusted colour in this?”
No, and yes. In my mind, I have not, I did though adjust ‘color’, and other items to get the photograph to what Joan and I saw on the morning walk. Though I did shoot a bracketed set, I did not do a HDR combination on the posted photograph, as I thought the Nikon D850’s properly exposed shot was really good.
What I did to the photograph before I posted.
First Noise reduction.
The photograph was taken at dawn, hand held. I wanted to reduce blur in the photograph that would occur from camera shake, so I forced a shutter speed that would reduce this. This results in my AUTO ISO running really high at 25,600. The effect of this is that you get ‘noise’ in the photograph.
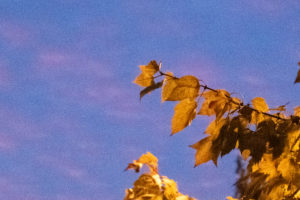
Here is a zoom’d in portion to show the process. What I started with;

The dots are the noise, and reducing them results in this;

The photograph immediately takes on a softer feel, by smoothing the noise into a more constant color and contrast.
Changing the Saturation
Next was a slight boosting of the saturation of the pink in the sky, and the blue

Here are the three steps

Other edits
I also straighten the photo, as I was holding the camera a little off.
The final adjustment that was made was how Adobe interprets the file. This is the final step that explains so much of color in Digital Photography. What the camera does is exposes the scene to a CMOS sensor, which produces a file of zero’s an one’s. The Camera could produce a JPEG which it calculates based on the 0&1 as the scene, but I shot RAW, and the file is all of the DATA from the sensor.
The post production then need to interpret the file to an image. That first step can change the image so much. Adobe has a ‘standard’ and Nikon has it’s and then they both have alternatives. The final image has Nikon Landscape Image Processing.
The Final Color Edit
The final color alteration is the screen you are reading this on. Think of this, the color of your room will alter if you use old fashioned tungsten bulbs, fluorescent lights, or LED, or bright sunshine. In the same way monitors on computers, tablets, and phones, can alter the color. The color ‘temperature’ of your screen, and the accuracy of it will alter the color. The monitors I invested in for my photograph editing are ” 100% sRGB, Color Accuracy △E< 5, Flicker free and 100% Rec.709 & 99.5% Adobe RGB true color reproduction, factory precalibrated for outstanding color accuracy (DeltaE<2)” What you are viewing this on may or may not produce the same color.
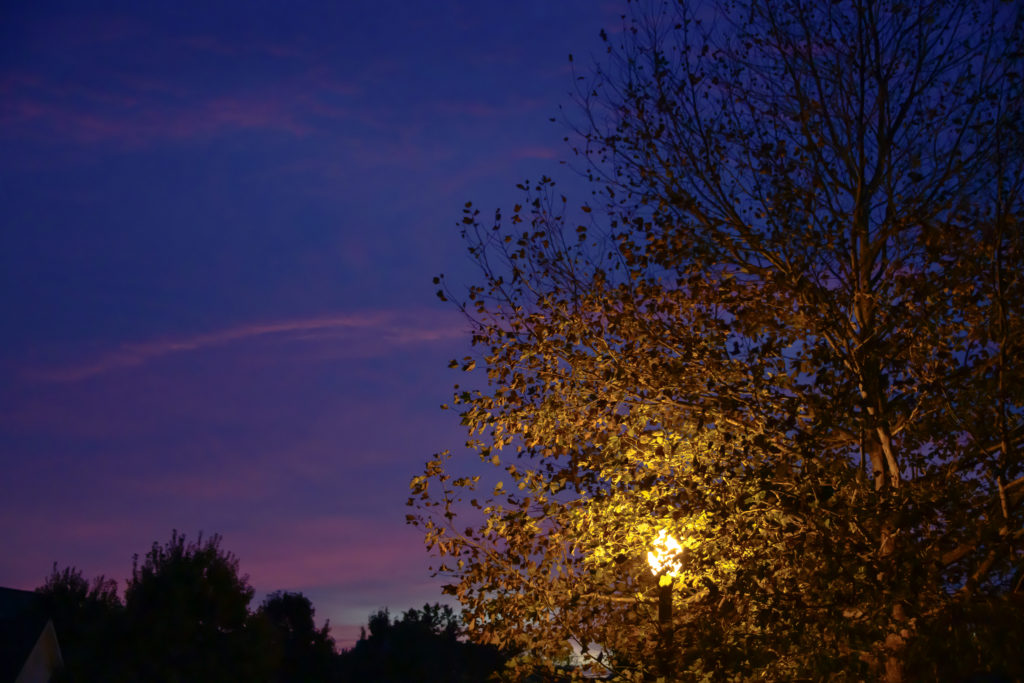
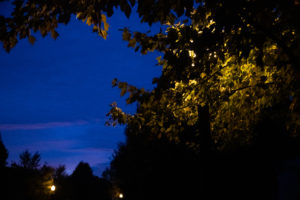
Original Shots
These are the original bracketed photographs (unedited), and once again, I did not combine these.
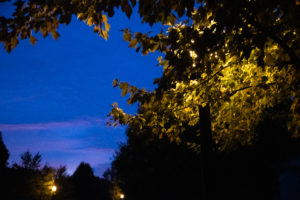
Start and end

The final does have more pink, and more blue than the starting image, it is also softer and straighter than the original, so yes, I did adjust the color, but….
The final image is what my eye saw when I looked at the sky beside the tree that early morning walk with Joan. The sky was SOOO PINK and that street light lit the tree so well, and the final, is what I saw.
If the question was, ‘did it really look like that?’ the answer would have been a simple, YES.
This is why I do not get bored with photography, it is so much to learn, find, capture, and create.
About the Author
Kevin Cossaboon
A networking profesional located in Northren Virginia, USA. My hobbies are Technology and Photography. Love playing with the latest technology, and will try to post reviews of them. Also love my life long journey of learning to capture light, to trigger emotions, through photography.
Great write up. The joy of photography really shines through.