Building a Smart Pixel Clock Dashboard with AWTRIX 3 & Home Assistant
How I turned a ULANZI TC001 into a living dashboard for RSS feeds, system alerts, and home automation.
The Hardware
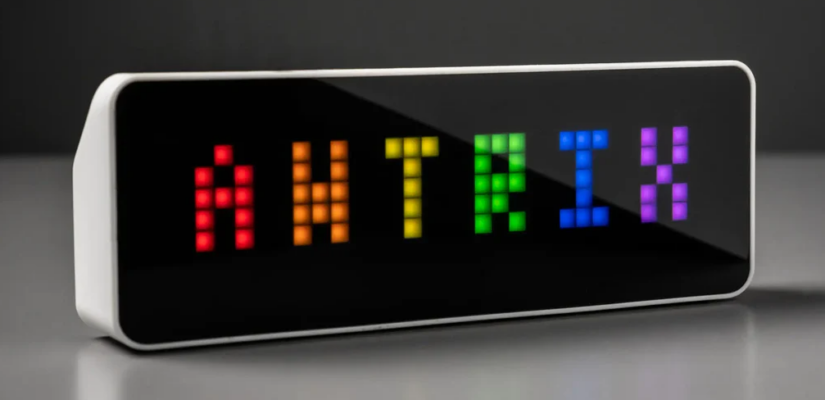
At the center of this project is a ULANZI TC001 Smart Pixel Clock running AWTRIX 3 firmware v0.98. This isn’t your average smart display—it’s a programmable LED matrix clock that supports custom apps via MQTT, HTTP APIs, and even sound playback through RTTTL (Ring Tone Text Transfer Language).
Network Architecture:
– Clock IP: 10.30.30.10 (IoT VLAN: “MostlyHarmless”)
– MQTT Broker & Home Assistant: 10.10.0.25:1883 (Core VLAN: “Dont_Panic”)
– Container Host: unRAID server “DockOfTheBay” at 10.10.15.1
Project 1: RSS Feed Ticker — Always-On News Display
The Concept
I wanted a way to display headlines from multiple RSS feeds on my AWTRIX clock, controlled directly from Home Assistant. No more checking my phone or laptop—just glance at the clock and see what’s happening in tech news.
Architecture
Home Assistant (10.10.0.25)
      │
      │  mqtt.publish
      │  topic:   awtrix/rss/control
      │  payload: ON | OFF
      ▼
MQTT Broker (10.10.0.25:1883)
      │
      ├─── SUBSCRIBE ──► rss-awtrix container (10.10.15.21)
      │                        │
      │                        │  ON  → fetch RSS → publish headlines
      │                        │  OFF → HTTP POST {} → clear clock
      │
      └─── PUBLISH  ──► awtrix/custom/rss
                              │
                              ▼
                    AWTRIX Clock (10.30.30.10)
The container holds two MQTT roles on one connection:
– Subscriber: awtrix/rss/control (control plane from HA)
– Publisher: awtrix/custom/rss (data plane to clock)
Technical Implementation
The service is a Python container using:
– feedparser 6.0.11 for RSS parsing
– paho-mqtt 2.1.0 for MQTT communication
– PyYAML 6.0.2 for configuration management
Key config (config.yaml):
mqtt_host: "10.10.0.25"
mqtt_port: 1883
mqtt_user: "mqtt_user"
mqtt_password: "mqttHome"
mqtt_prefix: "awtrix"
mqtt_app: "rss"

control_topic: "awtrix/rss/control"
awtrix_host: "10.30.30.10"

fetch_interval: 300      # seconds between RSS fetches
display_duration: 0      # 0 = scroll to completion at device SSPEED
max_headlines: 5         # headlines per feed

feeds:
  - url: "https://feeds.macrumors.com/MacRumors-All"
    name: "Mac"
    color: [255, 100, 100]
Home Assistant Integration
Helper Setup:
– Name: RSS Feed Display
– Entity ID: input_boolean.rss_feed_display
– Icon: mdi:rss
Automation — ON:
alias: "AWTRIX RSS Feed - ON"
trigger:
  - platform: state
    entity_id: input_boolean.rss_feed_display
    to: "on"
action:
  - service: mqtt.publish
    data:
      topic: "awtrix/rss/control"
      payload: "ON"
mode: single
Automation — OFF:
alias: "AWTRIX RSS Feed - OFF"
trigger:
  - platform: state
    entity_id: input_boolean.rss_feed_display
    to: "off"
action:
  - service: mqtt.publish
    data:
      topic: "awtrix/rss/control"
      payload: "OFF"
mode: single
Deployment on unRAID
The container runs on DockOfTheBay with a macvlan network (br0) at IP 10.10.15.21:
# First deploy
ssh root@10.10.15.1 mkdir -p /mnt/user/appdata/rss-awtrix
scp rss_awtrix.py requirements.txt Dockerfile docker-compose.yml config.yaml \
    root@10.10.15.1:/mnt/user/appdata/rss-awtrix/
ssh root@10.10.15.1 "cd /mnt/user/appdata/rss-awtrix && docker compose up -d --build"

# Config-only change (no rebuild needed)
ssh root@10.10.15.1 "vi /mnt/user/appdata/rss-awtrix/config.yaml"
ssh root@10.10.15.1 "docker restart rss-awtrix"
Project 2: Uptime Kuma Alert Bridge
The Concept
I run Uptime Kuma (self-hosted monitoring at `http://10.10.15.18:3001/`) with Apprise notifications. I wanted to route those alerts directly to the AWTRIX clock with visual differentiation:
– Green for UP events
– Red + sound alert for DOWN events
Implementation
The bridge service listens for Uptime Kuma webhook payloads and translates them into AWTRIX notification commands:
# Example: Doorbell notification with sound
curl -X POST http://10.30.30.10/api/notify \
  -H "Content-Type: application/json" \
  -d '{"text": "Doorbell!", "rtttl": "doorbell:d=4,o=6,b=120:e,d", "duration": 3}'

# Example: Buzzer test sound
curl -X POST http://10.30.30.10/api/notify \
  -H "Content-Type: application/json" \
  -d '{"text": "Buzzer Test", "rtttl": "Beep:d=32,o=7,b=120:a,P,c#"}'
The containerized bridge at `http://10.10.15.20:5000/` handles the translation and includes a health endpoint for monitoring.
Home Assistant Brightness Control
One of the first things I built was a brightness adjustment entity in Home Assistant, since the AWTRIX clock’s brightness controls aren’t exposed via MQTT by default.
Clock settings:
# Set time format
curl -X POST http://10.30.30.10/api/settings \
  -H "Content-Type: application/json" \
  -d '{"TFORMAT": "%l:%M"}'

# Reboot the clock
curl -X POST http://10.30.30.10/api/reboot

# Check running apps
curl http://10.30.30.10/api/apps
Key Firmware Quirks (v0.98)
After extensive testing, here are the gotchas I discovered:
| Issue | Workaround |
|---|---|
DELETE /api/custom returns 404 |
Use POST with {} body to clear display |
| Colored text fragment array causes near-zero scroll speed | Use plain concatenated string with single color |
scrollSpeed in payload is ignored |
Use global SSPEED setting on device |
SSPEED is a multiplier — higher = faster |
Default 100; set above 100 to speed up |
duration time-stretches scroll to fit window |
Set display_duration: 0 to let SSPEED control speed |
| Many sites block feedparser’s default user agent | Pass agent="Mozilla/5.0 (compatible; RSS Reader/1.0)" |
Scroll Speed Control
Scroll speed is controlled globally on the clock, not in individual payloads:
curl -X POST http://10.30.30.10/api/settings \
  -H "Content-Type: application/json" \
  -d '{"SSPEED": 150}'  # Higher = faster (default is 100)
Manual Control Without Home Assistant
You can control the RSS feed directly via MQTT from any machine:
# Start display
mosquitto_pub -h 10.10.0.25 -u mqtt_user -P mqttHome \
  -t awtrix/rss/control -m ON

# Stop display
mosquitto_pub -h 10.10.0.25 -u mqtt_user -P mqttHome \
  -t awtrix/rss/control -m OFF
Or clear the clock manually:
curl -X POST "http://10.30.30.10/api/custom?name=rss" \
  -H "Content-Type: application/json" \
  -d '{}'
Lessons Learned
- MQTT retain is critical: Set
retain: falseon all AWTRIX MQTT messages. Retained messages cause persistent display issues. - Sound requires payload inclusion: RTTTL sound only triggers when included in the notify payload—standalone
/api/rtttldoesn’t work on this hardware. - Config priority matters:
config.yamlloads first, then env vars override. Keep feeds/settings inconfig.yamland leave env vars commented out to avoid conflicts. -
Containerized is better: Running the RSS service as a Docker container with macvlan networking keeps it isolated and makes updates painless.
-
Home Assistant is the brain: Using HA helpers and automations provides the perfect control layer—toggle switches, dashboards, and voice control all work seamlessly.
What’s Next?
The AWTRIX platform supports custom apps beyond just RSS feeds. Potential future projects include:
– Weather displays with real-time forecasts
– Calendar integration showing upcoming events
– Smart home status dashboard (lights on/off, doors open/closed)
– Custom animations and pixel art
– Integration with other monitoring tools (Prometheus, Grafana alerts)
The combination of AWTRIX 3’s flexibility, Home Assistant’s automation power, and containerized deployment creates a powerful platform for smart displays that actually do something useful.
Have questions about the setup or want to share your own AWTRIX projects? Drop a comment below!
About the Author
Kevin Cossaboon
A networking profesional located in Northren Virginia, USA. My hobbies are Technology and Photography. Love playing with the latest technology, and will try to post reviews of them. Also love my life long journey of learning to capture light, to trigger emotions, through photography.